

Azure KeyVault is a cloud service provided by azure which allows us to store and manage the sensitive data like passwords, API keys, and encryption keys etc used by our applications.
Challenge: Our D365FO application rely on various third-party APIs, each requiring unique API keys for access. These keys are sensitive credentials that need to be handled with utmost care to prevent unauthorized access and potential security breaches.
Current Approach: We currently store these API keys directly within our applications, This poses a significant security risk and creates challenges in managing and rotating these keys.
Desired Outcome: We need a secure and centralized solution to manage and access these API keys, ensuring keys are stored in secure environment, minimizing the risk of unauthorized access.
Now let’s see how we can create KeyVault, store secrets and retrieve it in our D365FO application.
1) Create and Setup a new Azure KeyVault
Go to the Azure Subscription you have on Azure Portal. Search for KeyVaults page.
. Resource Group: Select an existing resource group or create a new one by clicking “Create new” and entering a desired name.
. Name: Give your KeyVault a name that identifies its purpose.
. Location: Choose a region where your KeyVault will be deployed.
After filling the necessary details. click the “Review + create” button.

You can see the deployment is completed successfully.
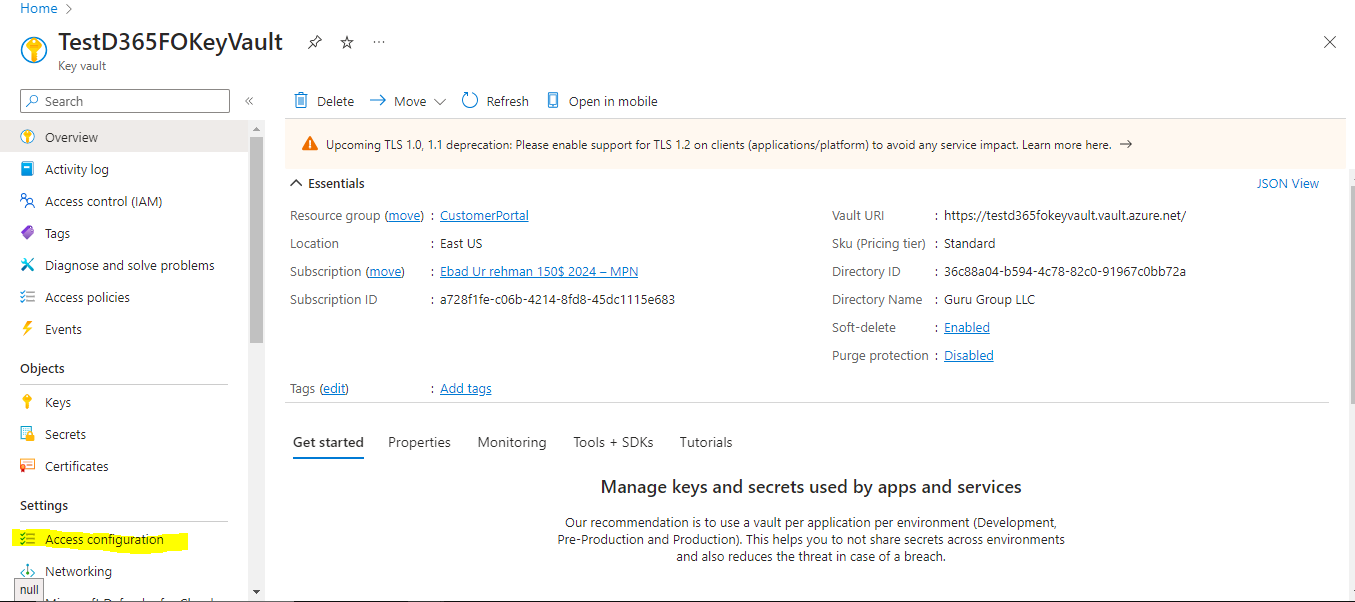
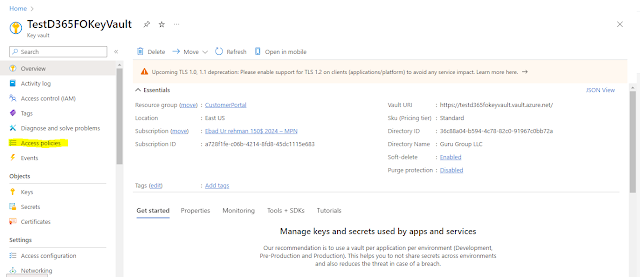
Copy the KeyVault URI we just created, we will use it inside our D365FO application.
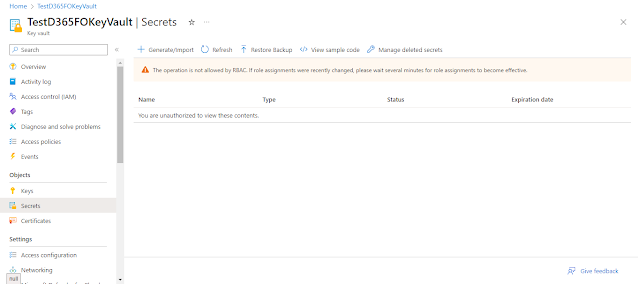
Navigate To Secrets on the left side of the menu for storing your secrets.
When you open a Secrets window, you will see there is an error message that says “You are unauthorized to view these contents” indicates that your user account lacks the necessary permissions to access KeyVault data.
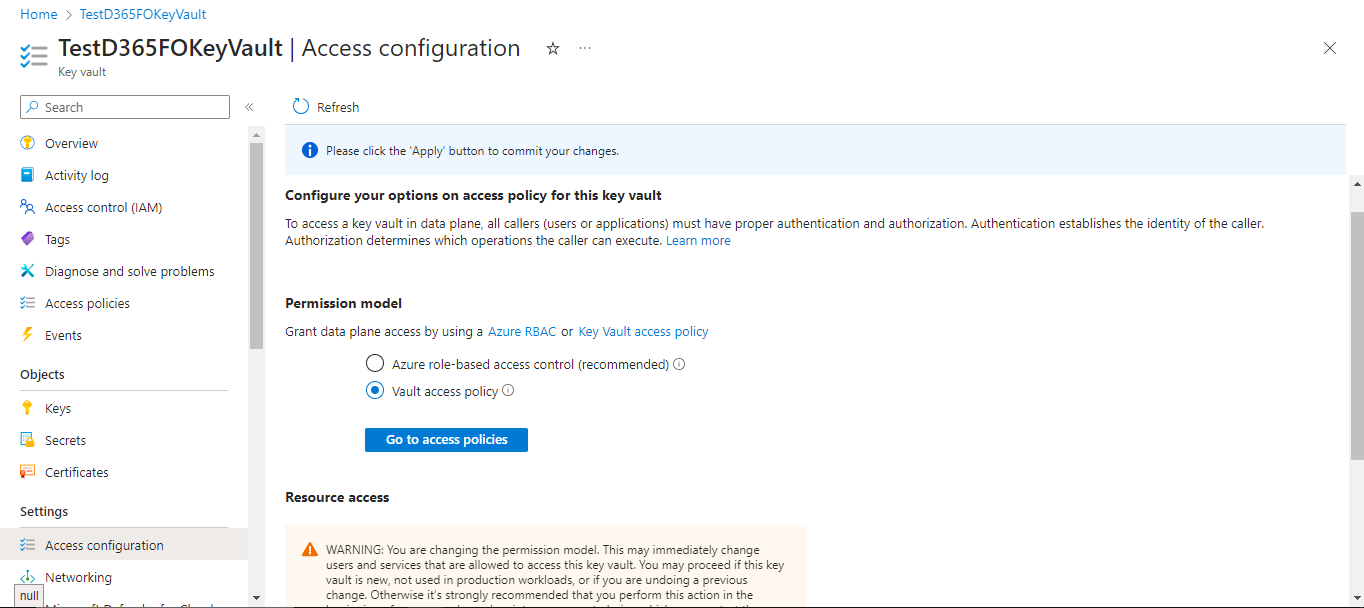
To solve this, Navigate to Access configuration on the left side of the menu.
Select the Permission model to “Vault access policy” which applies access control exclusively to KeyVault itself, Click “Apply” to save changes.
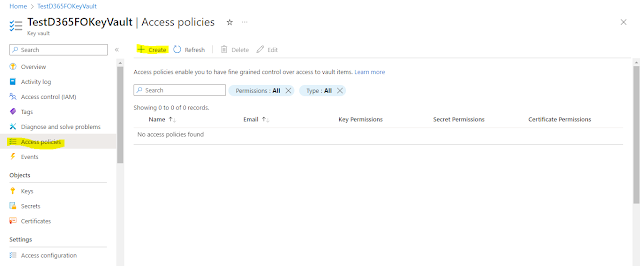
Navigate to Access Policies on the left side of the menu. Click on “Create” button to create a new access policy.
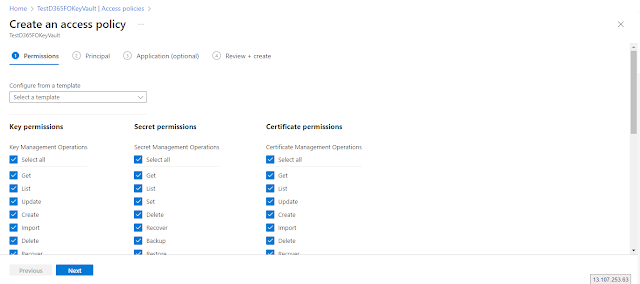
For now, I am assigning all permissions for Key permissions, Secret permissions and Certificate permissions. Click the “Next” button.
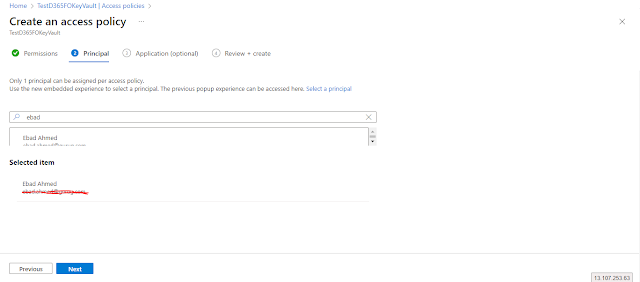
On the Principal window, select the user that you want to grant access to your KeyVault. Click the “Next” button.
On the Review + create tab, you will see the permissions previously assigned, Click on the
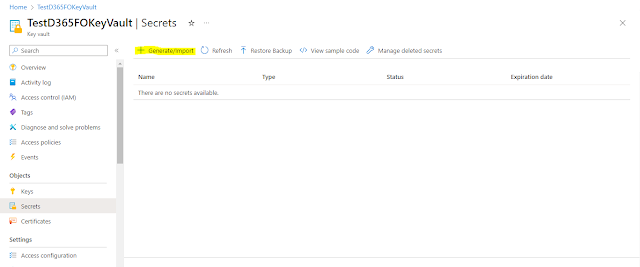
“Create” button. Navigate to Secrets page, now we can see the error message is no longer here and we can “Generate/Import” the secrets.
2) App Registration
Let’s register an app which allows us to access our Azure KeyVault from D365FO.
On the Azure Portal, search for App Registration.

Click on the “New registration” button.

.Name: Give your App a name.
.Supported account types: We will select the “Accounts in this directory” option which allows access to this app for your tenant.
Click on “Register” button. We will copy the Client ID and Tenant ID that we will be using in the D365FO application.
Navigate to Certificates & secrets on the left side of the menu.

We will create a client secret by clicking on the “New client secret” button.
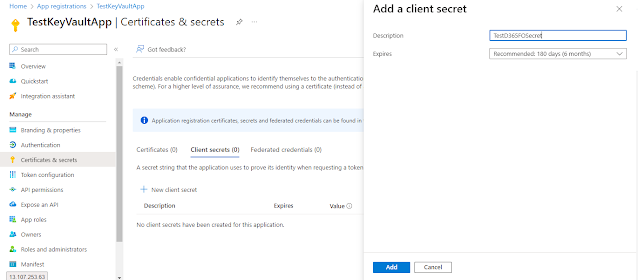
Copy the Value which is the “Secret ID”.
3) Assign Permission
Let’s assign permission from our KeyVault that we created to access the app we registered in the previous step.
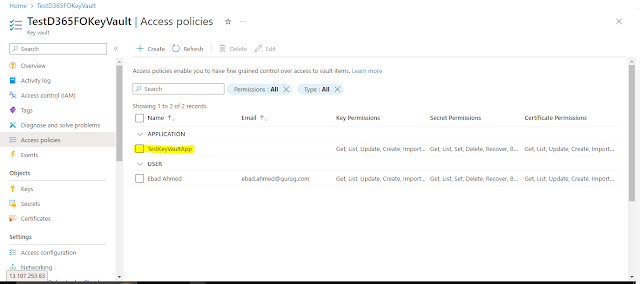
Navigate to the KeyVault you created. Go to Access policies on the left side of the menu.
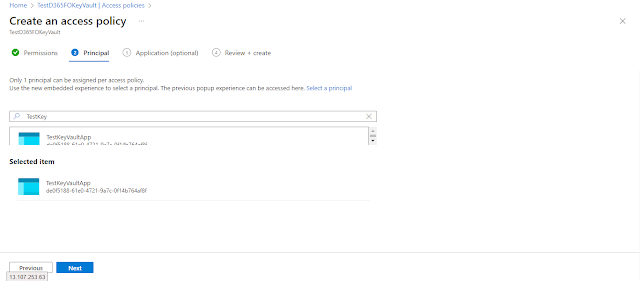
Create a new access policy by clicking the “Create” button. Assign the permissions for our KeyVault.
On the Principal tab, select the application you registered in the previous step.
As you can see, we have assigned the access policy for our application.
4) Configure in D365FO
Open the D365FO environment you have.
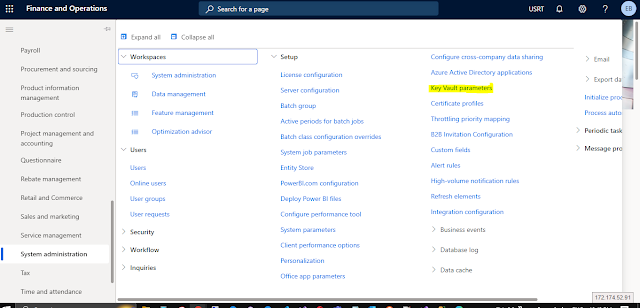
Navigate to System administration > Setup. Open the Key Vault parameters form.
Fill the necessary details we copied earlier.
Name: Give it some name.
Key Vault URL: KeyVault URI.
Key Vault Client: App Registration- ClientID
Key Vault secret key: App Registration-Secret Value

Now we can define our secrets. Format for the Secret field should be written in the below format.
vault://[keyvaultname]/secretname/[secretversion]
If you don’t specify a secret version, it will use the latest one.
Set the Secret Type as Manual.
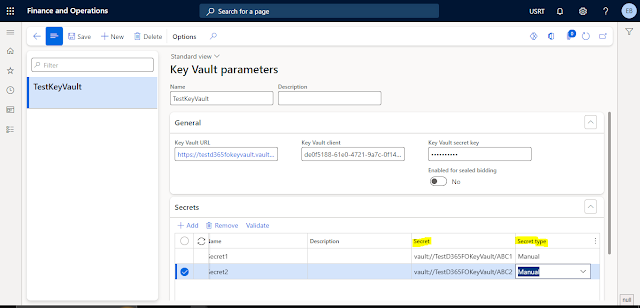
In this manner, we can define as many secrets we created in the Azure KeyVault.
5) Retrieve Secrets Using X++
Let’s see how can we retrieve secrets from Azure KeyVault using X++.private static str
getKeyVaultSecretValue(str _keyvaultSecretName)
{
    KeyVaultCertificateTable certificateTable = KeyVaultCertificateTable::findByName(_keyvaultSecretName);
    str keyvaultValue = KeyVaultCertificateHelper::getManualSecretValue(certificateTable.RecId);
    return keyvaultValue;

}
In this manner, we can retrieve any secret defined in the Azure KeyVault.
That’s it folks! Happy TechJourney.

