

Overview:
In this blog post, we’ll explore the process of creating custom services in Dynamics 365 Finance and Operations, empowering you to extend the capabilities of your ERP system to meet the unique needs of your business. Whether you’re looking to integrate with external systems, automate processes, or enhance user experiences, custom services offer a flexible and powerful solution.
Let’s take a scenario where dynamics is holding the data and that data can be exposed outside by using a service. So how to create a service from Dynamics and try to expose it outside and try to use it within the postman that is the first step actually to ensure that I am able to interact with the postman.
Tools Required:

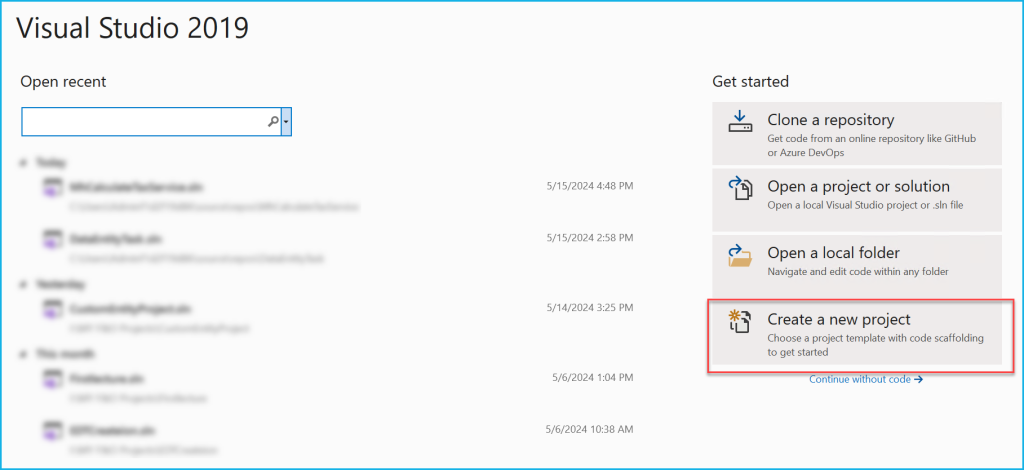
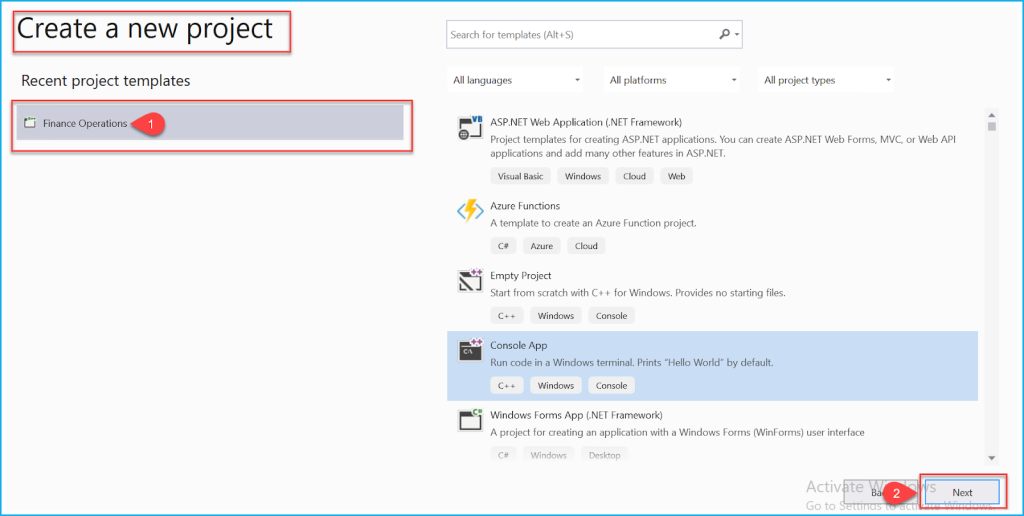
Create a new project in Visual Studio
Follow the steps:
Follow the steps:
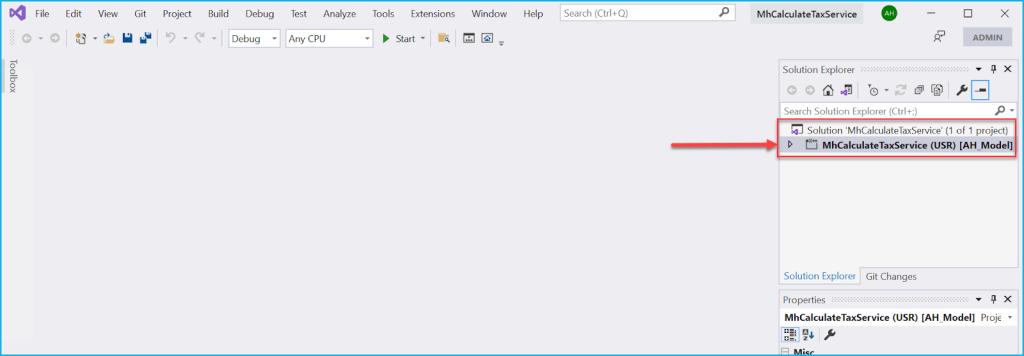
A project has been created:
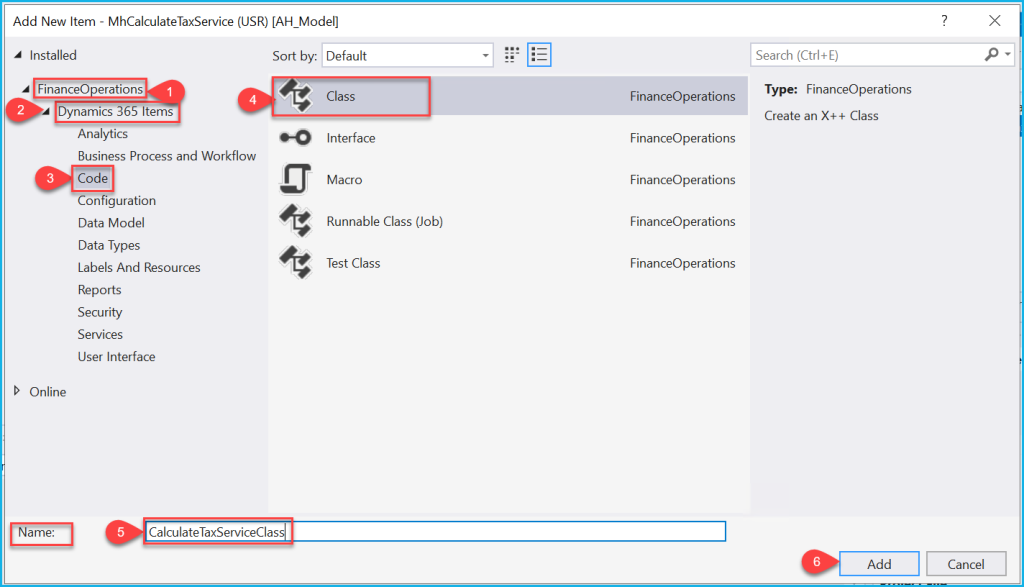
Create a class:
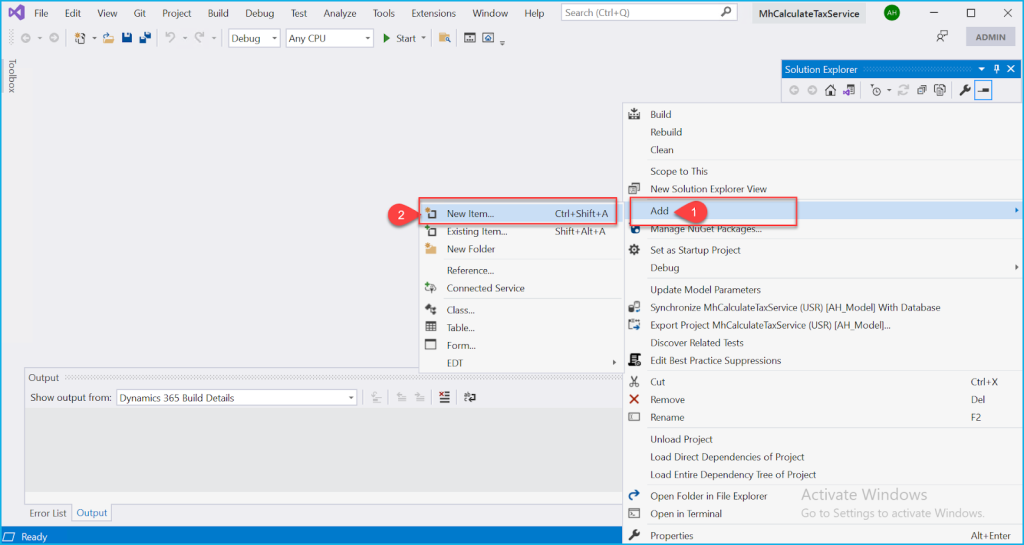
Follow the steps:
Code:
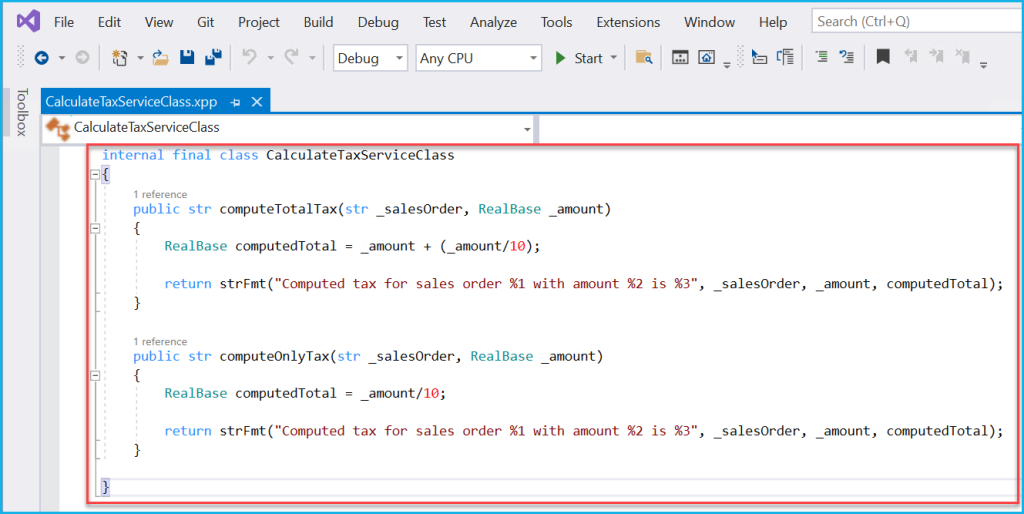
Copy code and paste in the class:
internal final class CalculateTaxServiceClass
{
    public str computeTotalTax(str _salesOrder, RealBase _amount)
    {
        RealBase computedTotal = _amount + (_amount/10);
        return strFmt("Computed tax for sales order %1 with amount %2 is %3", _salesOrder, _amount, computedTotal);
    }
    public str computeOnlyTax(str _salesOrder, RealBase _amount)
    {
        RealBase computedTotal = _amount/10;
        return strFmt("Computed tax for sales order %1 with amount %2 is %3", _salesOrder, _amount, computedTotal);
 }
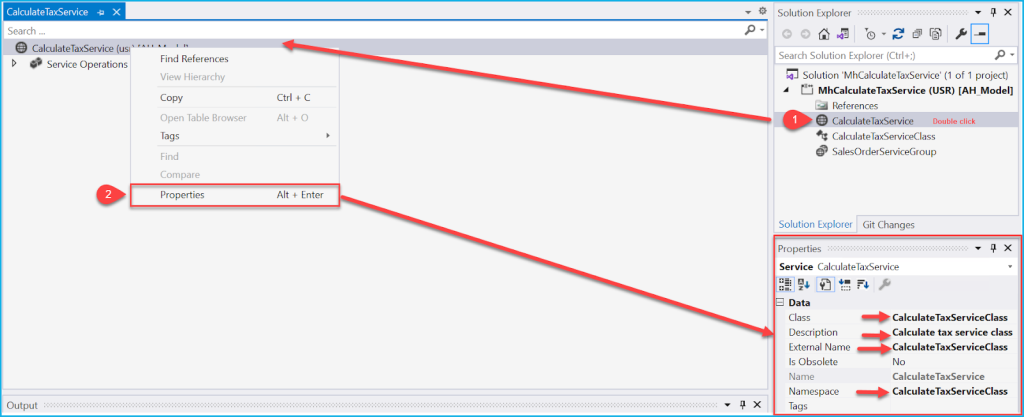
Create a Service:
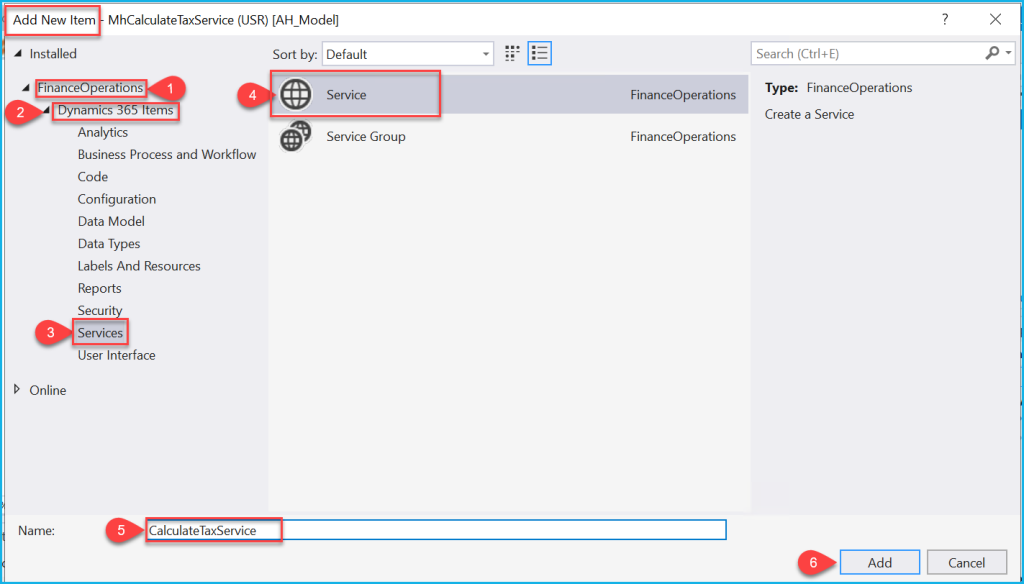
Follow the steps and enter the values in the fields of properties:
Write the class name in “Class” property.
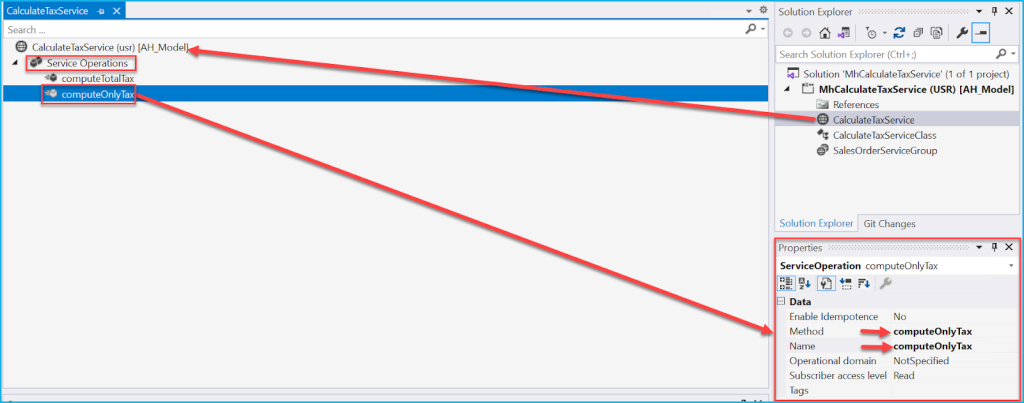
Create Service Operation:
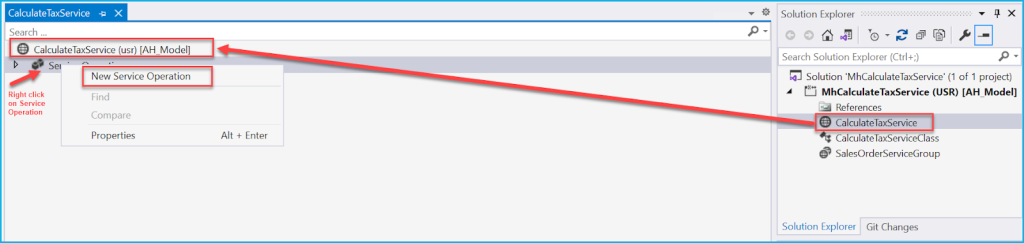
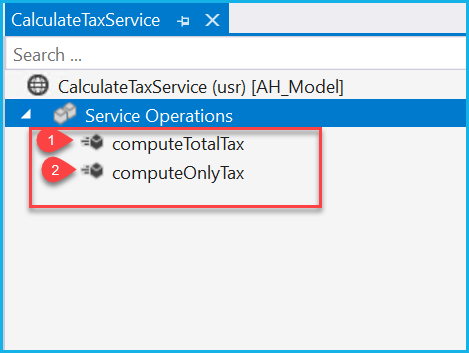
Create two operations:
Operation name same as method name in the class:
Follow the steps and enter the values in the fields of properties:
Method = Method name in the class:
Follow the steps and enter the values in the fields of properties:
Create Service Group:

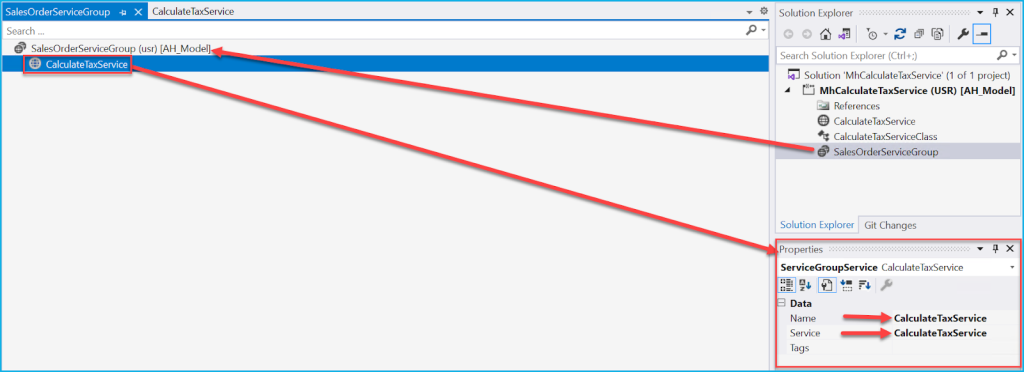
Add the Service or drag and drop the service into the Service Group:
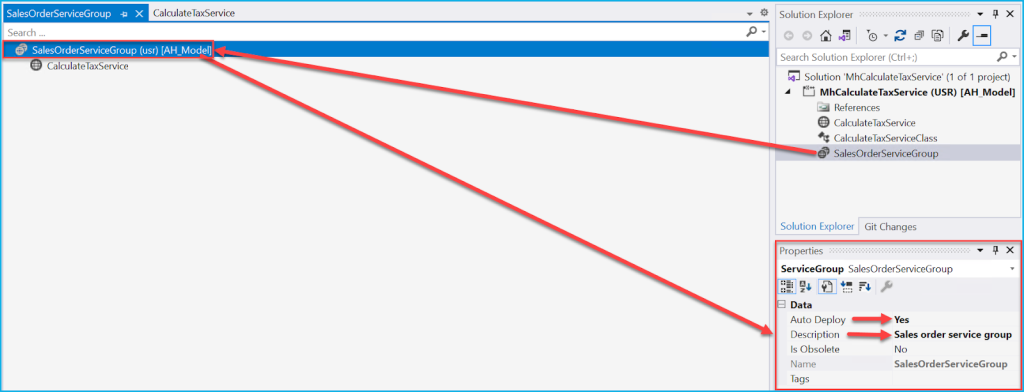
Follow the steps and enter the values in the fields of properties:
We can trace the services, service group and the method in the class by this URL
Dynamics URL\api\services\ServiceGroup\Serivce\ServiceOperation:

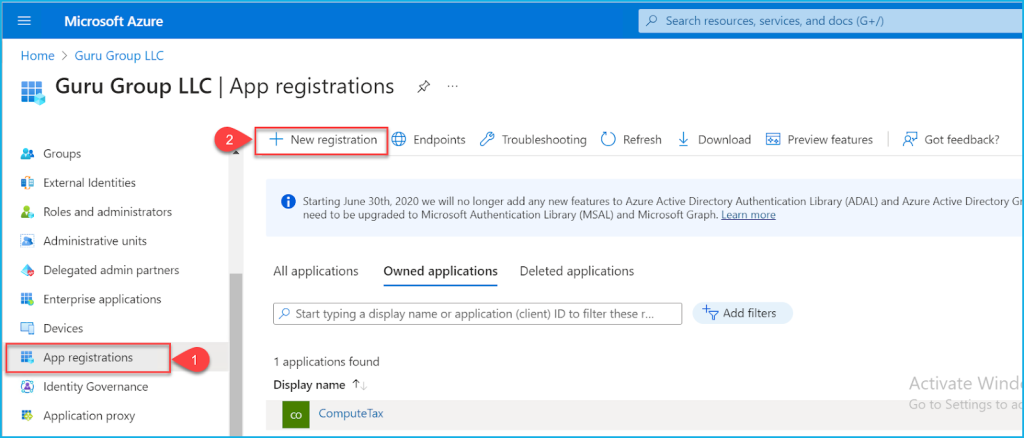
Visit portal.azure.com and follow the steps:
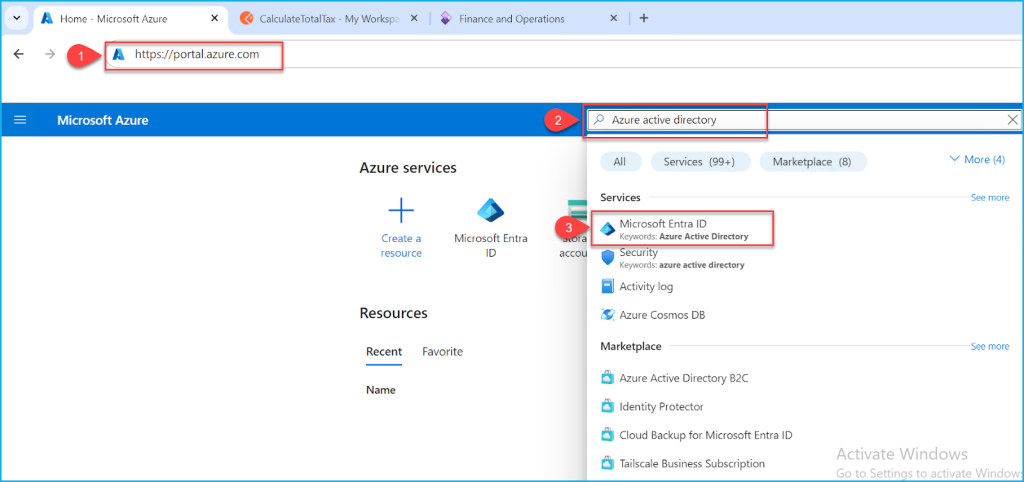
Register new App:
Follow the steps:
Follow the steps:

App has been registered. keep save the Application (client) ID, Object ID and Directory (tenant) ID for further use:
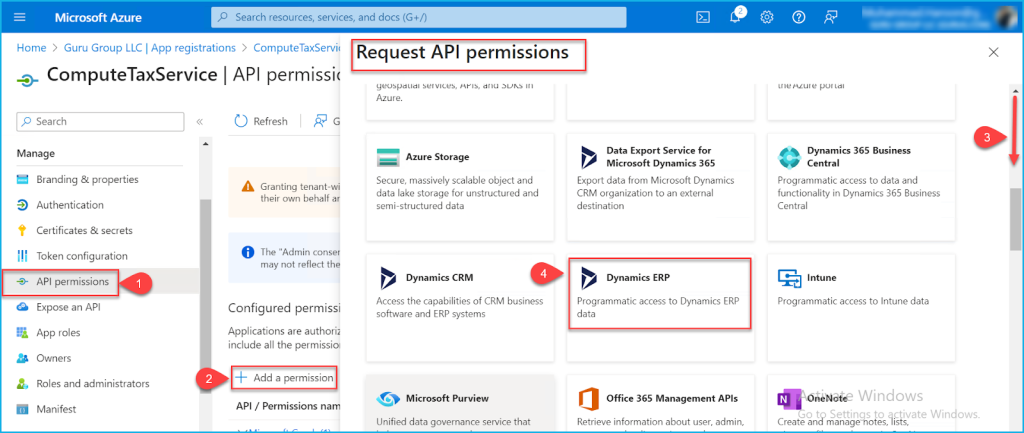
+Add a permission and Follow the steps:
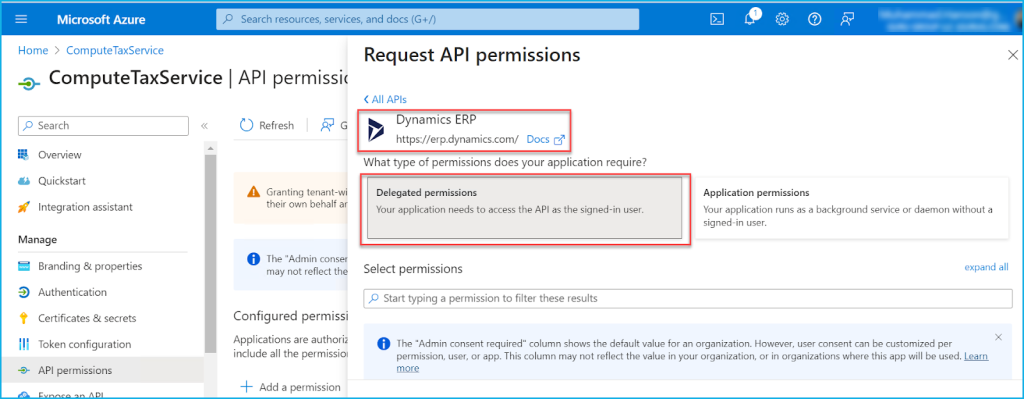
First click on Delegated permissions:
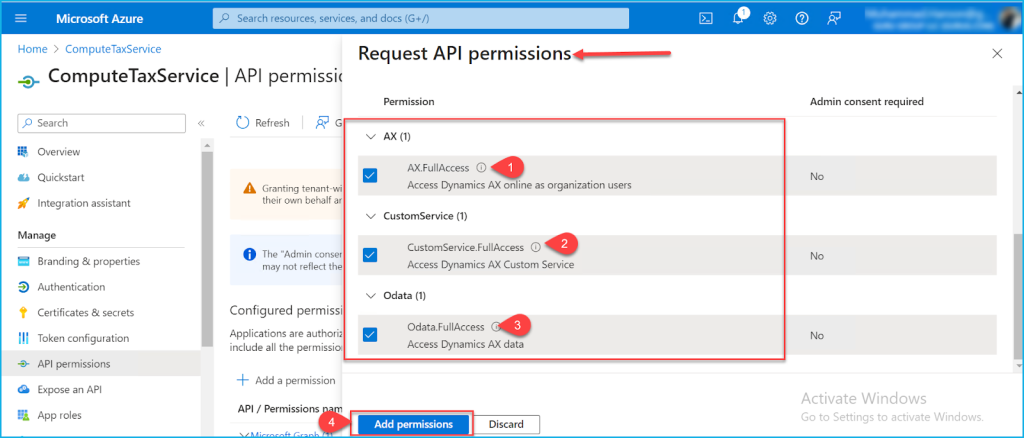
Select/tick all and follow the steps:
Again +Add a permission:
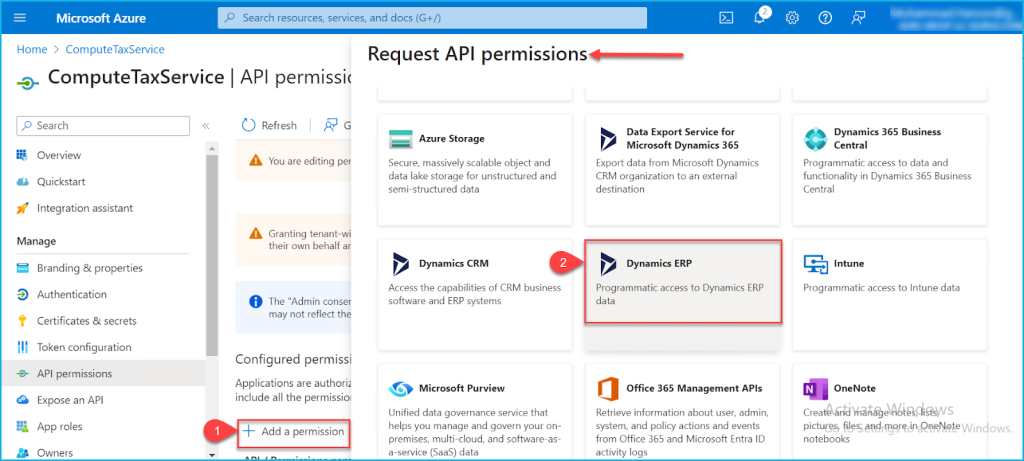
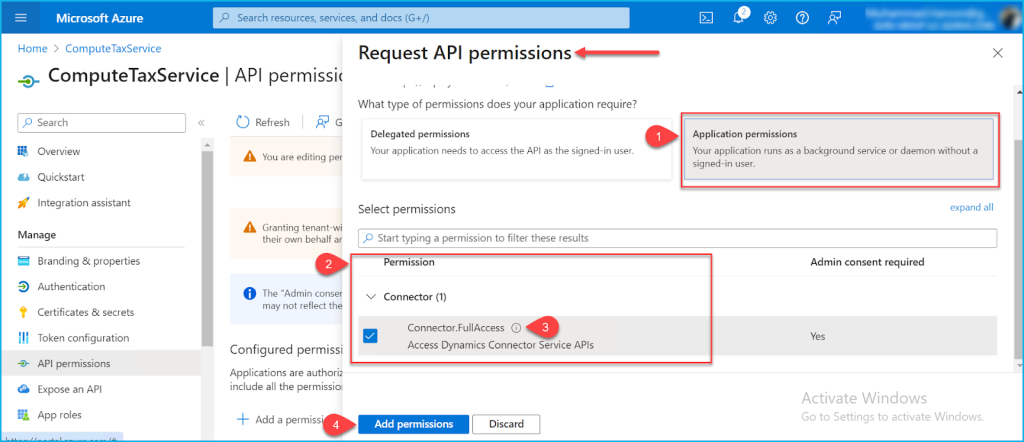
Now this time click on Application permission and follow the steps:
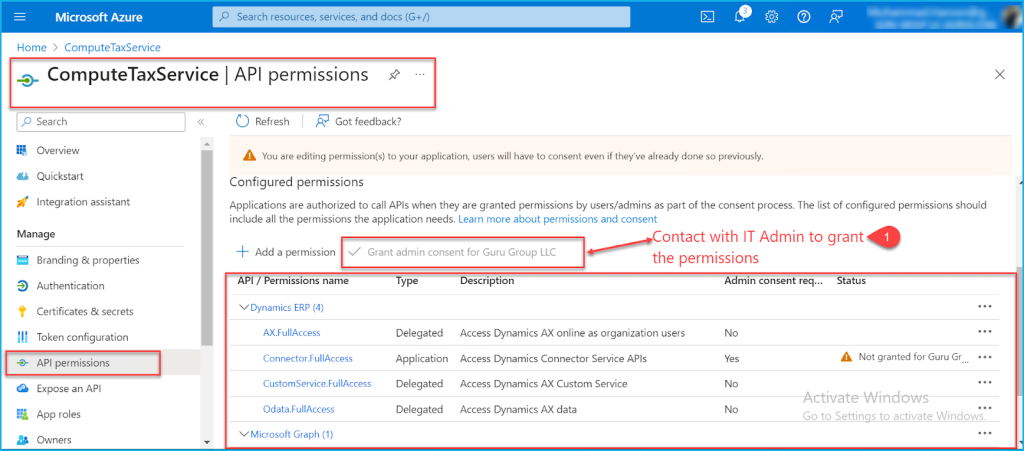
Contact your IT admin to grant the permissions to complete the permission process successfully:
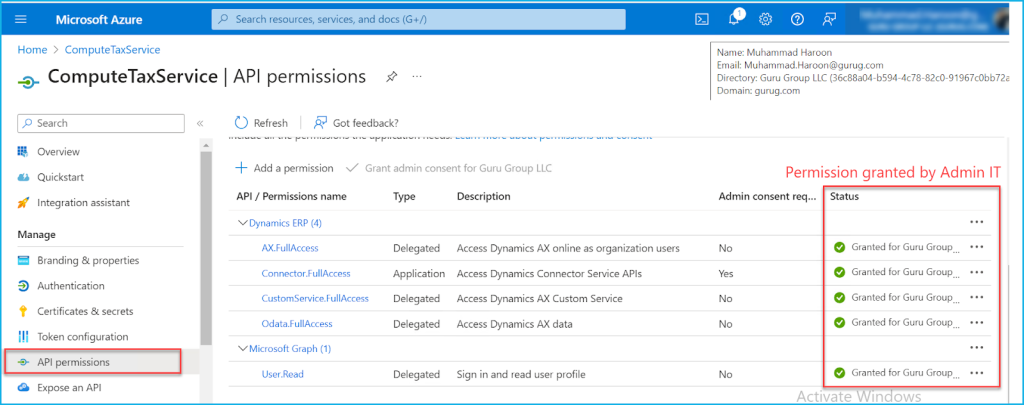
After permission granted by IT Admin:
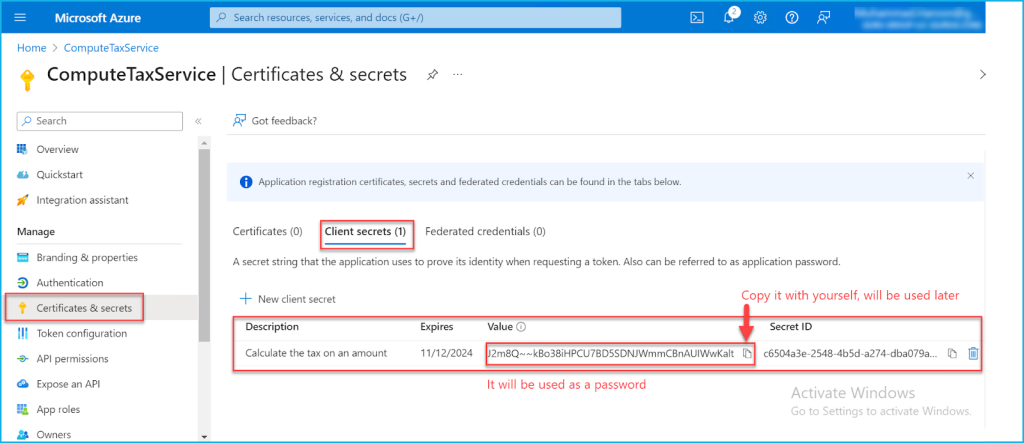
Go to Certificates & secrets and follow the steps:
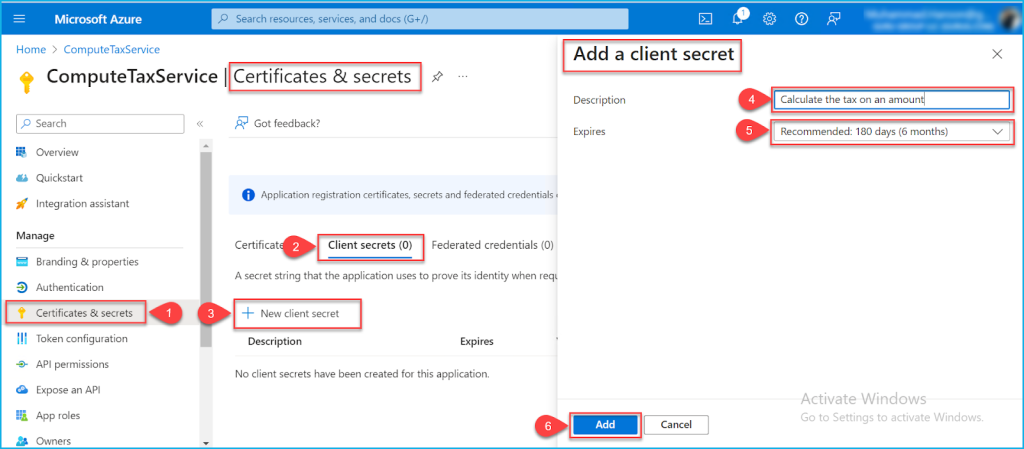
Copy the “Value”, will be used later in the PostMan part:
Go back to Dynamics and follow the steps:
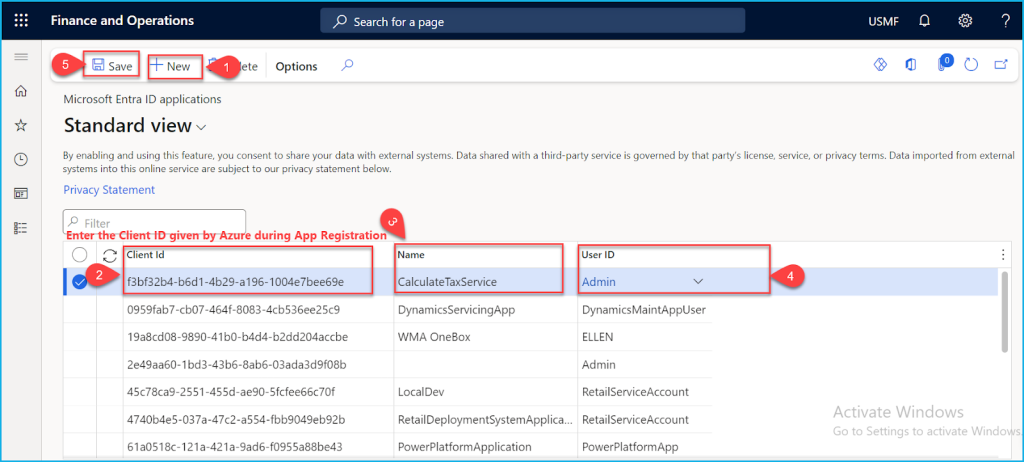
Click on +New and enter the “Client ID” given by Azure during App registration:

Go to web.postman.co, create new workspace or start work in already created workspace:
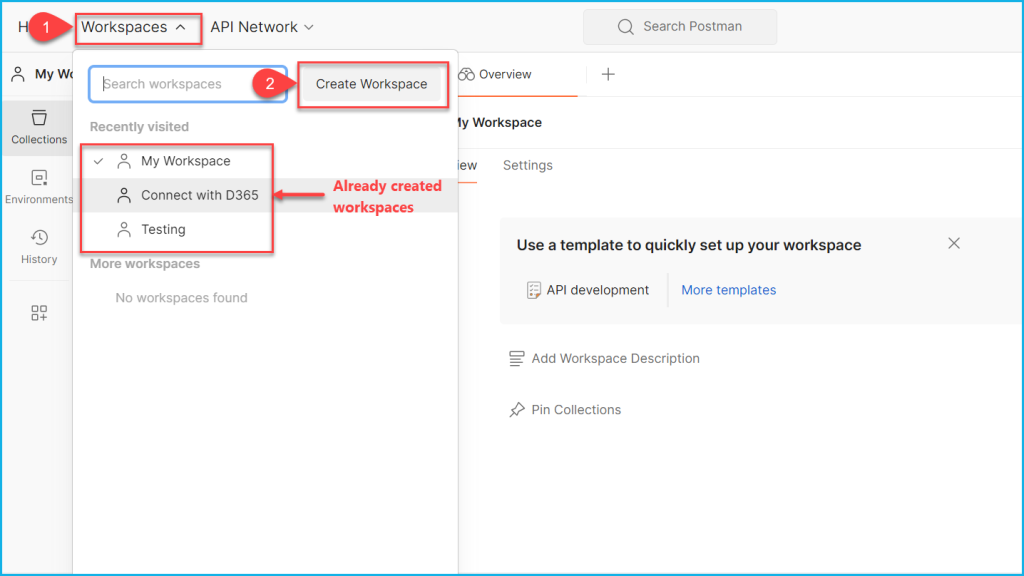
Follow the steps to create new workspace:
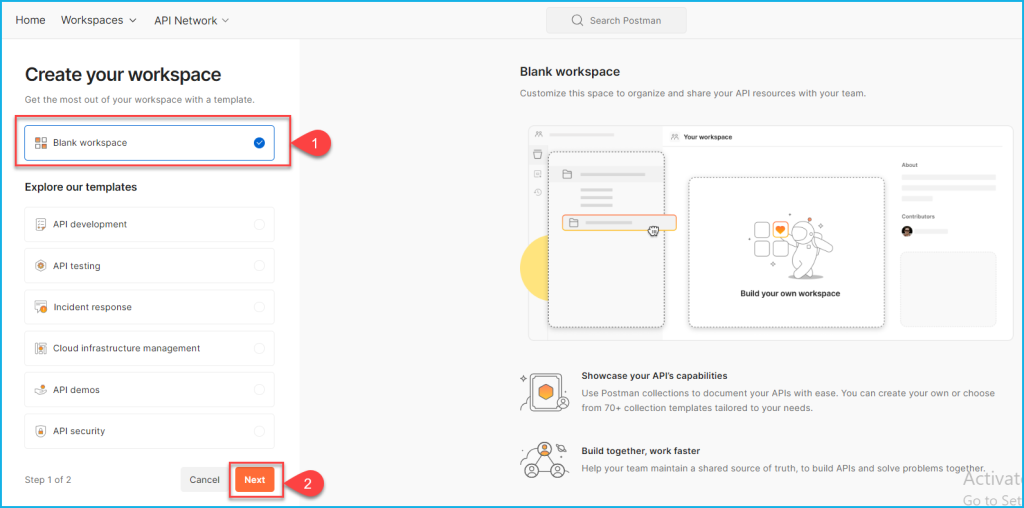
Name the workspace and create:
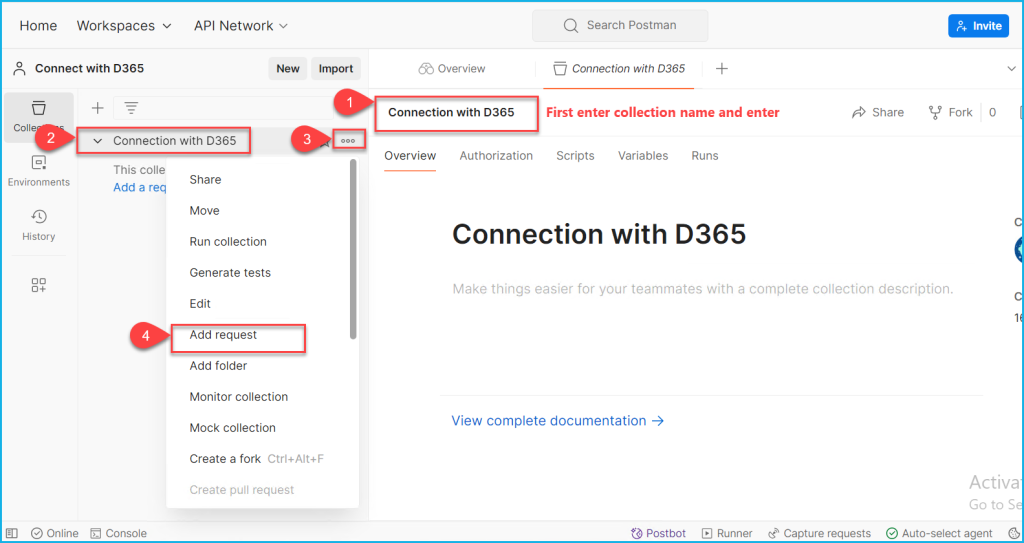
Select the workspace, Create new Collection in the Workspace and follow the steps:
Follow the steps:
Follow the steps one by one:
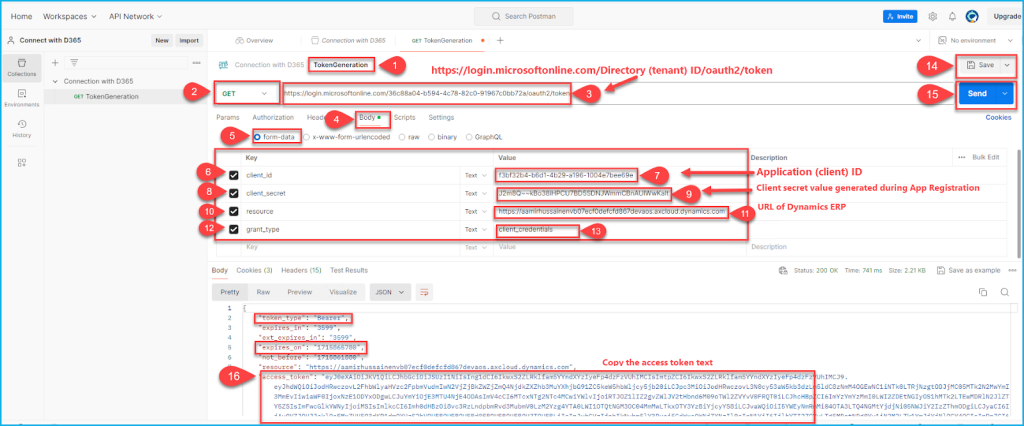
After saving and “Send” the GET request, I got the token, copy this token:

Take the URL as it in the screenshot below:
dynamicURL/api/services/your service group/your service/your service operation.
Here the service operation is “computeTotalTax”.
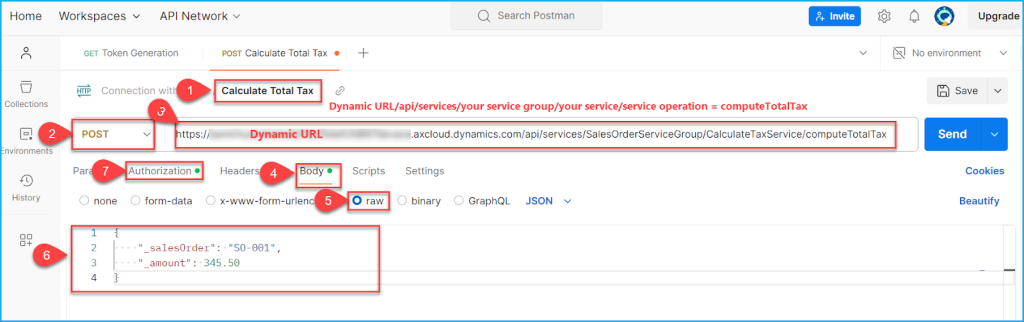
Copy the above URL in step 3 and follow the following steps:Passing the parameters Sale Oder and amount for which we find the amount with tax.
Select the Auth Type, which is “Bearer Token” and paste the token in step 4:
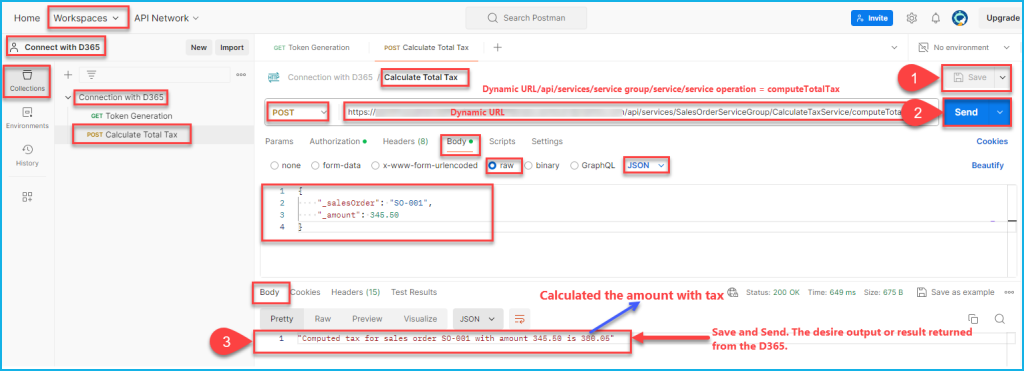
Save and send has been done already in the above screenshot, You will get the amount with tax from the dynamics.
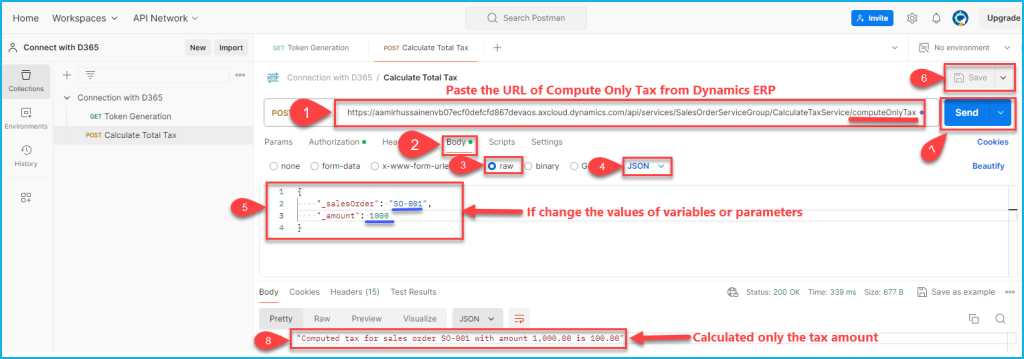
Change the URL for finding only the tax amount in step 1:
dynamicURL/api/services/your service group/your service/your service operation.
Here the service operation is “computeOnlyTax”.
change the input for which you find the tax amount in step 5.
In last “Save ” and “Send”. You will get the result or output in step 8.


