

API is a messenger that translates requests between applications, enabling them to work together.
Imagine two people who speak different languages (applications). An API acts as the translator, allowing them to communicate their messages into a format they both understand (data exchange). This enables them to share information and work together.
Challenge: Integrating Dynamics 365 for Finance and Operations (D365FO) data with my E-Commerce application to retrieve the Customers related data, generating sales order back and forth requires a secure and efficient API layer.
Solution: Utilizing Azure API Management Service, I aim to establish a robust API layer that seamlessly connects my E-commerce app to D365FO data entities. This service empowers me to:
. Expose APIs: Create and publish secured APIs that grant controlled access to specific D365FO data.
. Enhance Security: Use various techniques within the API Management service to safeguard sensitive data from unauthorized access.
Now let’s see how to create an API management service for our APIs.
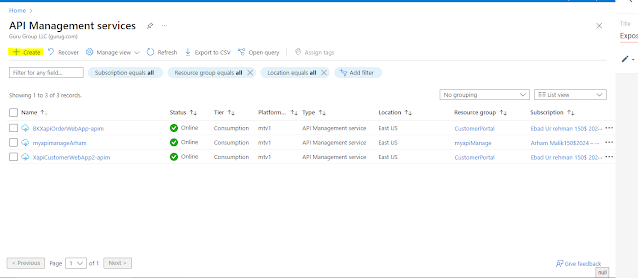
Go to the Azure Subscription you have.Navigate to API Management Services as shown in the below image.
This will open a new window. I’ve created some API management instances, which are displayed above. If you dont have any, we can create one for you now
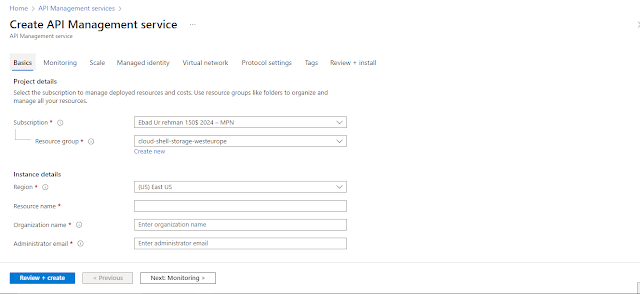
Click on the Create button a new window will open.
You can see your existing subscriptions here. Additionally, you can choose an existing resource group or create a new one. Let’s create a new resource group for our API management instance.
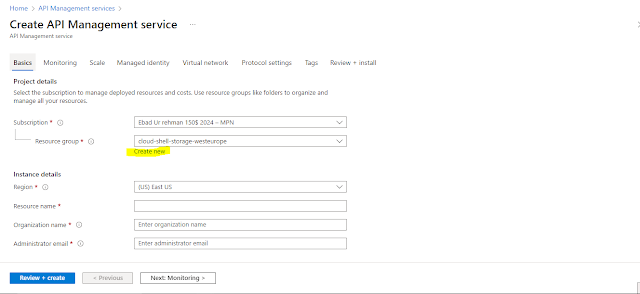
Click on the Create new link under the Resource group.
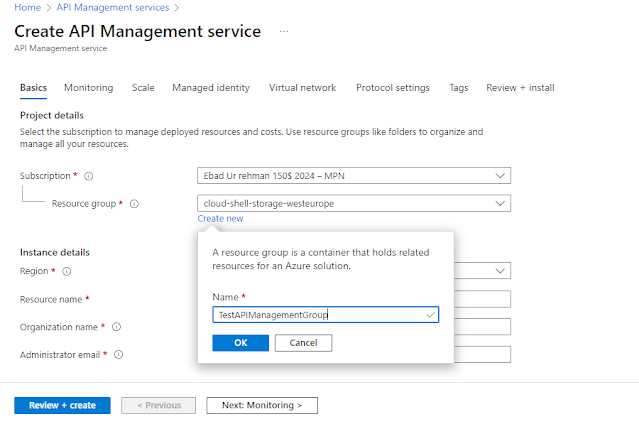
Click OK, new Resource group is created for our API management instance.
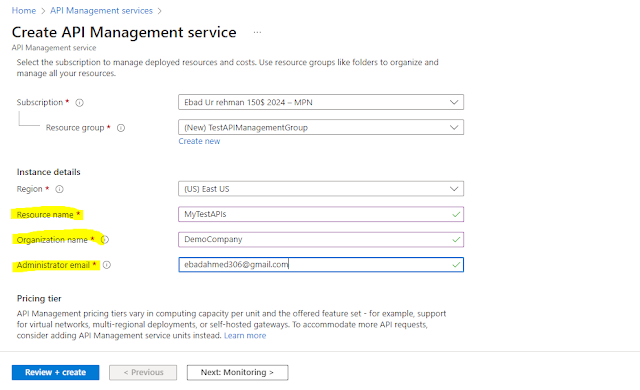
Give the Resource name, Organization name and Administrator email as shown in the above image. Click Review + create button.
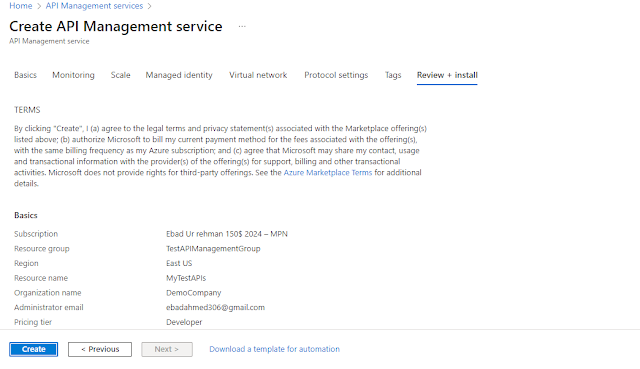
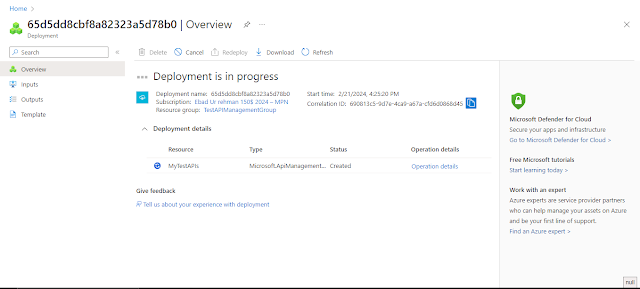
You will see a window displaying all the information about the selected subscription, resource group, region etc. Click the Create button. Deployment will take some time.
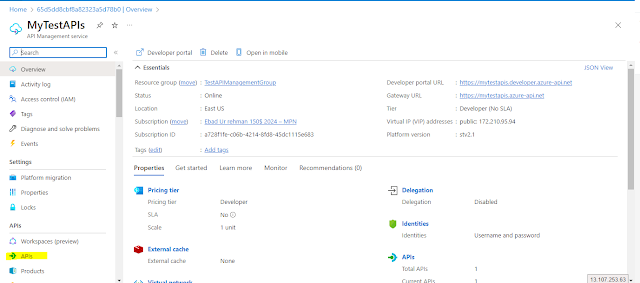
When the Deployment is completed.You can see your API management instance created.
> On the left menu, click on “APIs” under “APIs” section.
We have different options for exposing our APIs.We will know how we can expose APIs using OpenAPI (Formerly known as Swagger) which is a widely used specifications for describing Restful APIsas shown in the image above. OpenAPI allows developers to easily test and share API specifications, which promotes interoperability and collaboration among development teams.

Here is my JSON file. If you dont have one you can check the sample JSON provided by Microsoft for testing purposes https://conferenceapi.azurewebsites.net.
Now Click on the OpenAPI tab.
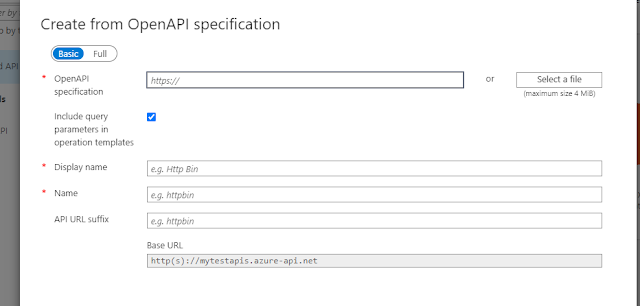
Provide a JSON file link in the OPENAPI specification that you can use from the link provided above or your own JSON file.
Provide a API URL suffix so that how will your endpoint url will look.

Now we have defined the different attributes. Click the Create Button. It will show all the APIs defined in the Swagger JSON file that we use in the OPENAPI specification.
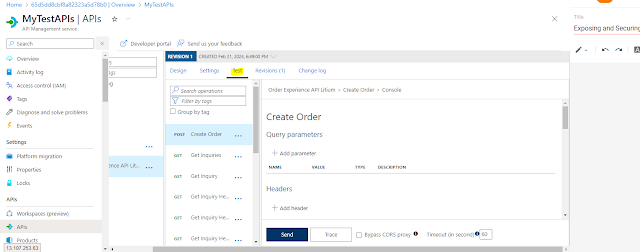
We can also Test our API using the Test button in the upper menu tab.
Now when you access your APIs you will see an error

This is due to the Subscription key is required to access the APIs.It is used to secure our APIs so that no one from external world can access you APIs. It is setup under the Settings tab there is a checkbox where Subscription Required is checked.
We can also uncheck this and there will be no need for subscription key.But for our scenario we will use the subscription keys.So here is a question where we will be creating the subscription keys.So lets create one.
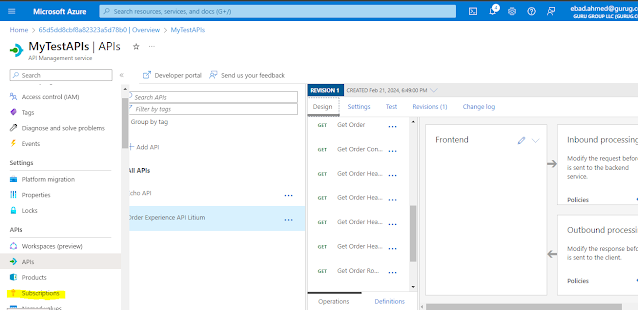
Click on the Subscriptions on the left hand side of the menu under APIs section.
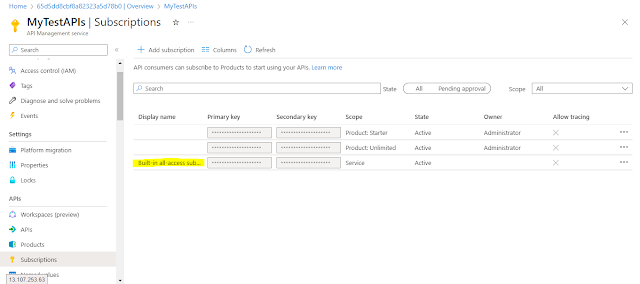
We will copy the Primary key from the Built-in-all-access subscription which allows us to use this key for all the APIs in this API management instance.
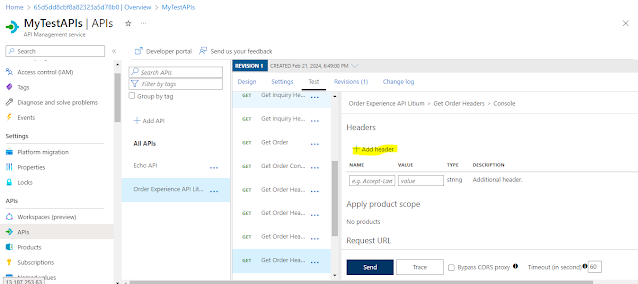
Now Navigate again to the Tests tab from upper side of the menu. Now click on any API you have. Add the Header from the Add header button shown below.
The default name for subscription key is Ocp-Apim-Subscription-Key.
Value is the primary key we copied earlier.so we will paste it in the value textbox.
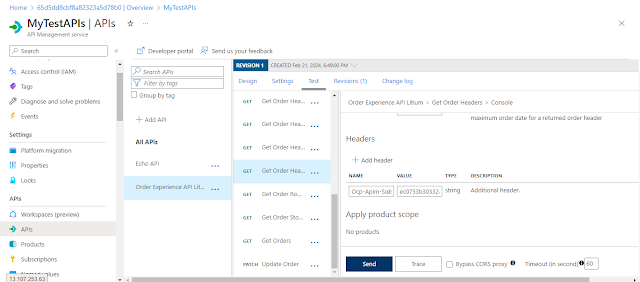
Now when we hit the Send button it will give us the expected response.
You might be asking what if I have to add more OpenAPIs and want to use a different set of subscription keys for them.In this case you can use a feature known as Products.Lets see how can we add APIs to Products and then use different subscription keys for each API.
Navigate to Products in the left side of the menu.
A new window will appear. Click on the Add button.
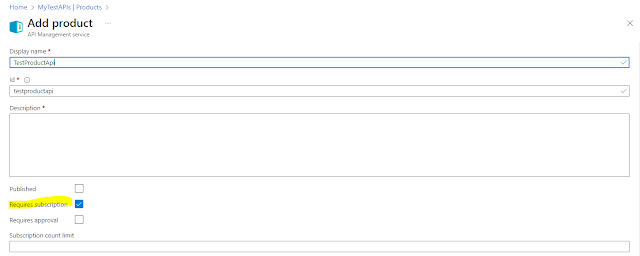
A window will appear where you give it a Display name and Description. As you can see the Requires Subscription is checked. You can also set the Subscription count as well.
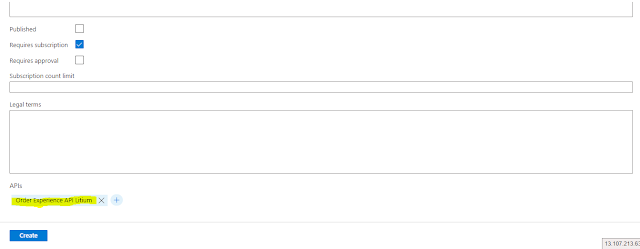
Click on + button under APIs to group the APIs to a Product.
As you can see I have selected my API that I was using in this post. Click the Create button.
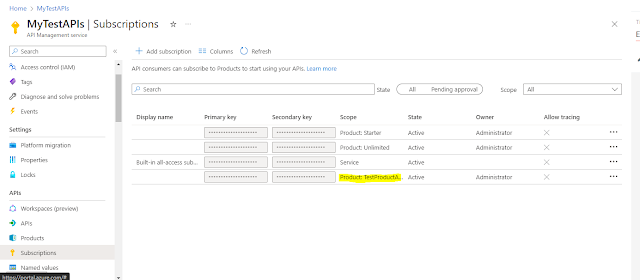
You can see your Product listed in the Products section. Navigate back to Subscriptions on the left side of the menu and you will see a subscription keys are setup for your product you just created.
Copy the Primary key and lets test our API with this key. Navigate back to APIs in the left side of the menu. Open the Test tab on the upper side of the menu.
Select any API you want to test. As you can see we can select the product we created.
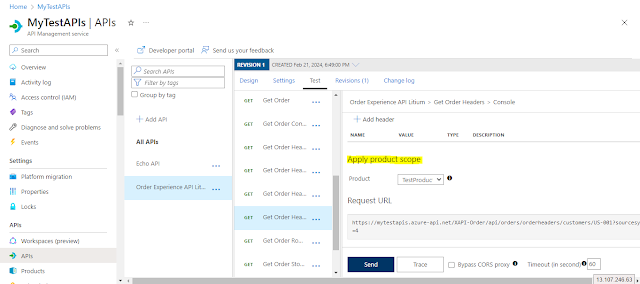
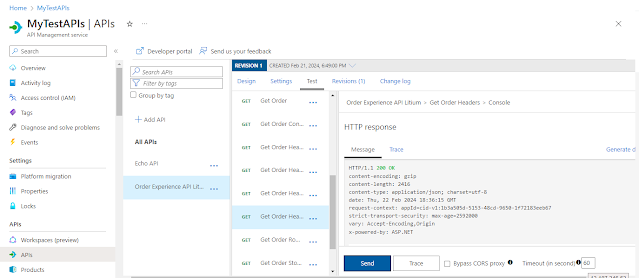
After selecting the Product we are ready to go. Click the Send button to get the expected response.
Thats it folks! Happy TechJourney.

